|
The Bit-Grip drill accessory has been seen on CBS News, CNN, Good Morning New York, Fox
News, & Discovery Channel.
Perfect
gift idea for woodworkers and weekend warriors.

Everyone
that uses electric or
cordless drills needs a
Bit-Grip.

Fits the body of electric drills and the battery of
cordless drills to secure drill bits
& screws close at hand.

Wrap the Bit-Grip on a cordless drill battery to
put an end to drill bit loss.

2 US
Utility
Patents
Makes piloting a hole quick and easy. Your
drill bit, counter sink bit, pencil and screw are all secured on the
sawhorse, drill or ladder.
It's not just for
woodworkers. Turn a shaving cream can into an instant
travel kit
Turn a visor into an organizer!

|

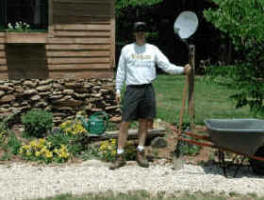
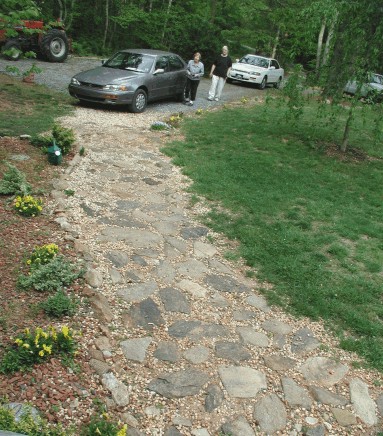
Building a stone walkway can be
easy.

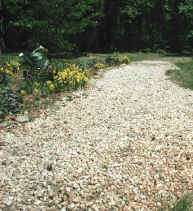
 I recently built a stone walkway to my front door. I had been using
small river rock as my walkway for several years but never really liked how it
looked nor how difficult the river rocks are to walk on. They are
constantly shifting under a persons weight.
I recently built a stone walkway to my front door. I had been using
small river rock as my walkway for several years but never really liked how it
looked nor how difficult the river rocks are to walk on. They are
constantly shifting under a persons weight.
 When I
began the project, I was simply curious how hard it would be to build a stone
walkway. I wasn't sure if I would need cement to secure the stones or if I
would dig holes or maybe I would just place the rocks on top of the ground.
When I
began the project, I was simply curious how hard it would be to build a stone
walkway. I wasn't sure if I would need cement to secure the stones or if I
would dig holes or maybe I would just place the rocks on top of the ground.
I had some stones laying around and simply tossed a couple on the
ground. After seeing how the rocks looked just sitting on the ground, I decided
that my rocks weren't the kind for an above ground walkway. Big flat rocks are the best for these.
How to decide what rocks to use?
I picked ones that had at least 1 flat side, were hard enough not to break or
crumble when walked on, were large but not too big for me to handle.
The bigger ones are less  likely
to shift and to rise up above the
surface after you've got them positioned well. I've found that rocks
with 1 flat side and a protruding opposite side work well. When you bury
the protruding side, it serves as an anchor or stabilizer.
likely
to shift and to rise up above the
surface after you've got them positioned well. I've found that rocks
with 1 flat side and a protruding opposite side work well. When you bury
the protruding side, it serves as an anchor or stabilizer.
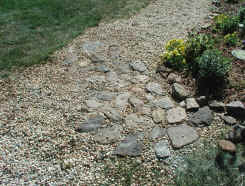
Since my rocks were all different shapes and sizes, I decided
to partially bury my rocks and let the flattest side be exposed. Cement
was out of the question because I was going for the simple cabin look..
So here it is:
Building a simple walkway directions
are about as complicated as shampoo directions: Dig hole, put rocks in, repeat. Okay, it's not that simple
but it's close.
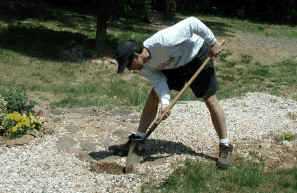
 Instead of just digging any hole, the fun for me in this project was trying
to dig the perfect hole for the particular rock that I was planning on placing.
This involves looking at the rock on all its sides and
determining which side to expose. Then make a guesstimate of the size and
shape hole and start digging. I buried my rocks so their flattest side protruded just a bit above the surface
of the surrounding river rock. River rock is not necessary as a
base. However, rocky soil underneath and aro
Instead of just digging any hole, the fun for me in this project was trying
to dig the perfect hole for the particular rock that I was planning on placing.
This involves looking at the rock on all its sides and
determining which side to expose. Then make a guesstimate of the size and
shape hole and start digging. I buried my rocks so their flattest side protruded just a bit above the surface
of the surrounding river rock. River rock is not necessary as a
base. However, rocky soil underneath and aro und the big rocks helps the
soil to drain. This reduces the mud factor.
und the big rocks helps the
soil to drain. This reduces the mud factor.
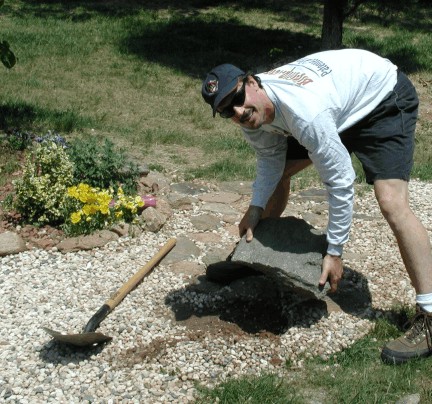
A little shovel or hammer can help dig out smaller parts so you can more
easily shape the hole to fit the rock.
If the hole isn't perfect, fill it in or dig it out some more, whatever it
needs. Keep fooling around with the size/shape of the hole until the rock
just slides into place. You'll know it when the rock's right.
Materials Needed for the Stone Walkway Project: Stones.
Tools Needed: Shovel, gloves, safety glasses, and perhaps a small
handheld shovel or a hammer.
Most Frequently Asked Question: Where do I get the stones? Lots
of places sell stones, just look it up in your yellow pages. If you're
lucky, you live near springs and creeks where you can gather your own
rocks. .
Never carry more than you can comfortably handle. Your back is more
precious than a walkway can ever be.
Second Most Frequently Asked Question? Isn't this hard work? Yes,
especially if you choose to gather and carry your own rocks.
However, don't try to do it in one day. I spread my work over a month's
time. I used it to relax in the evening when I came home from work.
Walk to the creek, carry up a few rocks, dig some holes and creatively position
the rocks. THERAPY.
If a rock isn't fitting like you want or the walkway is not looking like you
want, take a break. Come back tomorrow and try your luck again.
 It
was a thrill when I got close to done and my friends and family came to
visit. There's nothing better than seeing people use and enjoy your hard
work. I have a feeling this walkway will greet a lot more people than I'll
ever get a chance to.
It
was a thrill when I got close to done and my friends and family came to
visit. There's nothing better than seeing people use and enjoy your hard
work. I have a feeling this walkway will greet a lot more people than I'll
ever get a chance to.
Oh yeah, thanks to my good buddy Jeff Norman. I don't know where the
photos got off too, but he carried a bunch of rocks too! We treated it
like a trip to the gym.